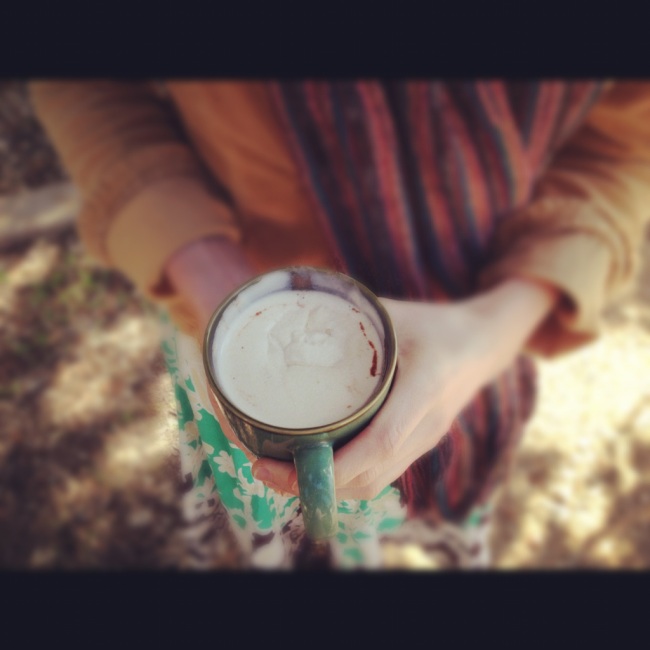
Saturday Morning Cup of Coffee….

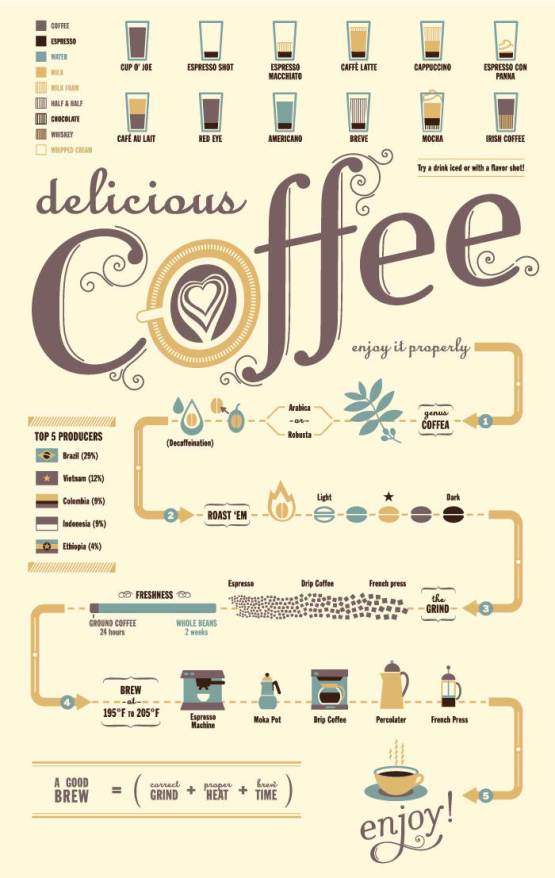
Gotta love coffee…. I do!! I LOVE (hm. maybe I shouldn’t say “love” when referring to food) LIKE it so much that  I have entire pinterest board dedicated to coffee. OK, so that may be taking my extreme enthusiasm for the black stuff too far! 😉

Anywho, a Saturday morning post dedicated to Coffee! (: Until next time, may your  roast be perfect, mug of coffee strong, and day blessed! 😉
(I attempted to link to the original source of each image! 🙂

“Blessed be the Lord, who daily bears our burden,
The God who is our salvation.”
Psalm 68:19

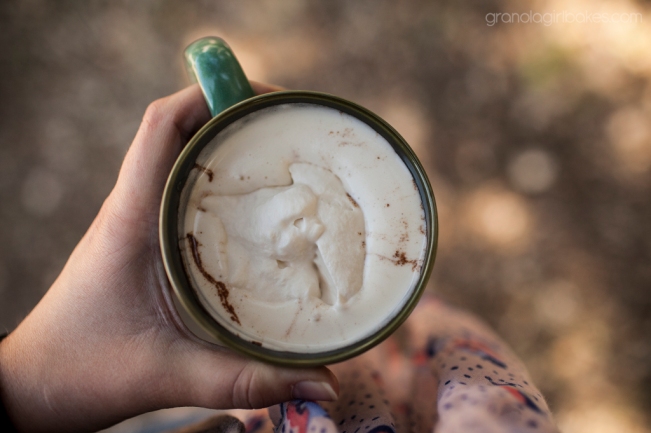
Seriously Delicious Hot Chocolate

The last 2 days have been COLD. Even colder seeing our heater is down for repair. We weren’t expecting such extremely chilly weather but after the scorching summer, we are loving it! So what goes with super cold weather better than a cup of Hot Chocolate and a few layers of sweaters?? 🙂

Hot Chocolate is a necessity for the winter months and I had been looking for the perfect Hot Chocolate recipe for years.  Finally found it! In the words of my sister, Grace, “this hot chocolate  is like drinking a brownie!” I found the original recipe on Cooking for Seven a year and a half or so ago and with only a few minor changes, we have been drinking it ever since!
Sweetened with Pure Maple Syrup and topped off with a maple whipped cream, yes, this recipe is RICH…. So rich, you may have a hard time drinking an entire serving! But y’all are sure to love it. 🙂

Original Recipe 5-6 cups of cocoa!

Ingredients

  • 3 1/2 cups whole milk(I usually add up to 1c more depending on thickness)
  • 1/2 cup heavy cream
  • 8 ounces chopped unsweetened chocolate
  • 6 tbs pure maple syrup(might need more if you prefer your cocoa a little sweeter!)
  • 2 tsp pure vanilla extract
  • 1/8 tsp salt

Directions:

  1.  In a medium saucepan, bring the milk and cream to a low simmer over medium heat, whisking occasionally.
  2.  Add the chocolate, maple syrup, vanilla, and salt. Whisk vigorously until all of the chocolate has melted. Cook for an additional 4 minutes, whisking constantly.

Maple Whipped Cream

Ingredients:

  • 1/2 cup heavy whipping cream
  • 1-2 tbs maple syrup (more if you like your whipped cream very sweet)
  • 1/2 teaspoon vanilla extract

Directions:

  1. Place all ingredients in a large bowl and beat until stiff.
  2. Add a dollop or two or four 😉 on your cup of cocoa and enjoy!

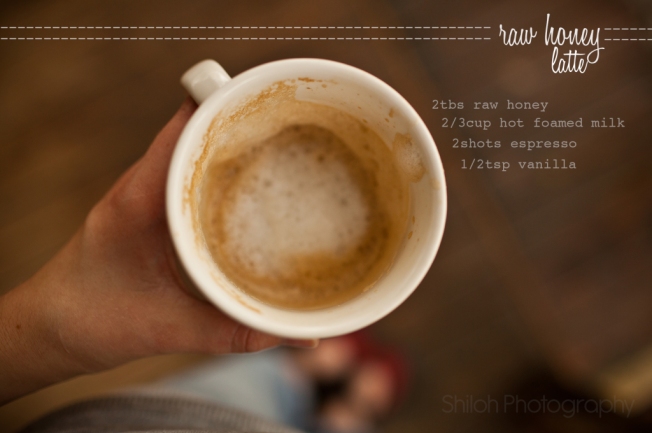
Raw Honey Latte | Simple But Sweet!

Its fall, which means its time to start experimenting with hot espresso drinks! 🙂 My personal favorite is a Caramel Cream Latte(which I will share the recipe to once I have the time to make the caramel sauce) but, as of late,  raw honey lattes have been the second best thing. I couldn’t stand the idea of honey in coffee until I finally gave it a try. Once I tried it, I was hooked! Sweet and smooth, raw honey makes one delicious latte!

  1. Pour hot espresso in mug, add honey and vanilla. Stir!
  2. Pour slightly foamed milk on top
  3. Sit back and enjoy! (:

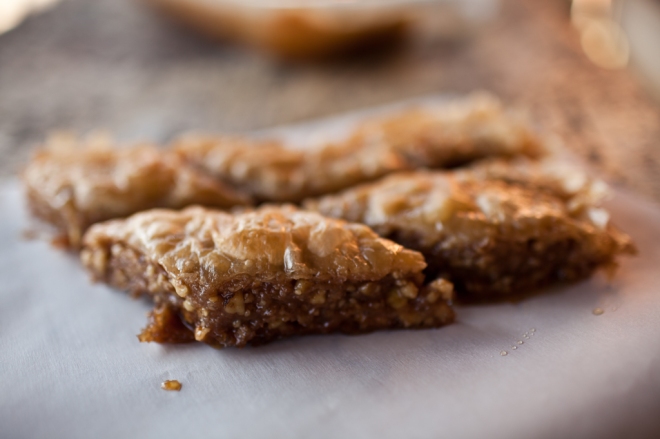
Baklava!

Baklava,  Turkish in origin and absolutely delicious! I usually make this in the winter but when cleaning out my freezer I found 2 essential ingredients for a batch. Since when did I buy a pound of phyllo (it must have been last winter…)? And since when do we have a spare pound of walnuts that are just waiting to be used?? Plus, I noticed I got a little over-zealous when buying honey last shopping trip. I had quite a stash of the golden goodness just yelling, “USE ME”! 😉  Seeing that everything was falling into alignment, I decided it was “meant to be” for me to make Baklava! 🙂
I made my first batch of baklava 8ish years ago after a local store that sold it closed. I still use the original recipe found here but the only thing is I am not afraid of butter and live by the motto, “everything better with butter!” 😉 So, I do use an addition stick of butter in my baklava. But I will post the original recipe. Just remember, you might need additional butter!
The hardest part of this recipe is waiting 24 hours for the Baklava to set without having some-one sneak a piece. But once it is finished, fix yourself a cup of Turkish Coffee, grab a piece of Baklava, and perhaps a scoop of ice cream on the side :), then enjoy!

Ingredients

  • 1 lb Walnuts – Finely Chopped
  • 1/2 C. Sugar
  • 2 tsp Cinnamon
  • 1.5 C. Butter (3 sticks), Melted
  • 1 Package Frozen Phyllo Dough (16 oz) Thawed
  • 1 C. Sugar
  • 1 C. Water
  • 1 Tbsp Lemon Juice
  • 1 C. Honey (Net weight 12 oz.)
  • 1/2 tsp Vanilla

Directions

  1. Preheat the oven to 300 degrees.
  2. Combine and set aside walnuts, 1/2 cup sugar, and cinnamon
  3. Using a pastry brush, lightly brush the bottom and sides of a 10×14″ (about 1-2″ deep) pan with melted butter.
  4. Open the phyllo dough and layer 6 whole leafs (or 12 half leafs) in the pan, buttering each layer as you go. (The edges will extend over the side.)
  5. Spread 1 cup of the walnut mixture.
  6. If your phyllo dough comes in full sheets, cut the remaining phyllo dough in half.
  7. Layer 8 half sheets — butter each layer. Each sheet will be an inch or so short, so stagger the sheets from corner to corner to cover the whole pan. I use a pattern so I don’t forget how many layers I’ve put down, but it’s even easier if you have a friend help!
  8. Spread 1 cup of the walnut mixture.
  9. Repeat 8 sheets and walnut mixture twice. You will end up with 4 layers of nuts.
  10. Layer the remaining half sheets on top — butter each layer.
  11. Brush the top with the remaining butter.
  12. Trim the edges off.
  13. Cut halfway through the layers using the (new and improved right-hand or left-handers) diagram to the right. See my baklava FAQ page for more tips on cutting. (Note: Do NOT cut from corner to corner.) This is done now since it will be very fragile after it’s been baked.
  14. Bake 1 hour or until golden brown.
  15. 15 minutes before the baklava should be done, mix 1 cup sugar, water, and lemon juice in a sauce pan.
  16. Cook sauce over a medium heat, stirring occasionally for 15 minutes.
  17. Remove from heat, add the honey and vanilla, and stir until well blended.
  18. Remove the baklava from the oven and finish cutting through the layers.
  19. Pour the sauce over the hot baklava.
  20. Cool. Let it sit for at least 24 hours (lightly covered — but not in the refrigerator) — longer if you can stand it!
  21. ENJOY!!


Quick Hamburger Buns |Of Dinner, the Olympics, and Grilling…

Is it just me or does anyone else think cooking needs to be considered an Olympic sport! Feels like I have run a marathon after making dinner. 🙂 Tonight’s dinner consisted of Rosemary Pesto Feta Burgers,  5 Cheese Mac n’ Cheese, Oven roasted French Fries, and vegetable. And this is the first time I have grilled without setting the meat I am grilling completely on fire and grilling myself!! I usually have my  Dad man the grill but he was out tonight. To be 100% honest I completely wimped out on the home-made condiments. I had everything laid out to make ketchup and mayo but fizzled!
But I did get around to making home-made buns! The quick version. 🙂 Not too fancy and nothing special about them but they are 1000% better than the pre-packaged store bought buns and QUICK!

Original Recipe Yield 8 buns

Ingredients

  • 1 cup warm water
  • 2 1/4 tsp active dry yeast
  • 1 tbs sugar
  • 1 tsp salt
  • 2 tbs olive oil
  • 2 1/2 cups(or more) flour(I use a 50/50 ratio of white and wheat)
  • 1 egg beaten

Directions

  1. Activate yeast in water and sugar. Once activated, add salt and oil. Mix in just enough flour to make a sticky yet workable dough.
  2. Pour dough out on to well floured surface and knead for 3 minutes, adding additional flour as needed!
  3. Place in lightly oiled bowl and allow to rise for 20 minutes.
  4. Roll out on to floured surface, punch down, and cut into 8 pieces. Form into balls, flatten each ball down, and place on to parchment lined cookie sheet. Allow to rise for 15 minutes.
  5. Brush with beaten egg. Bake at 425° for 12-15 minutes or until golden!
  6. Allow to cool, slice in half, and ENJOY! 🙂

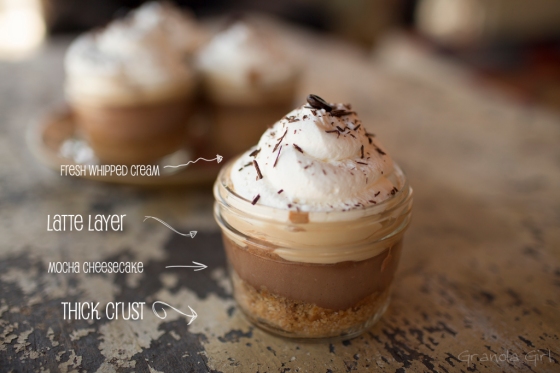
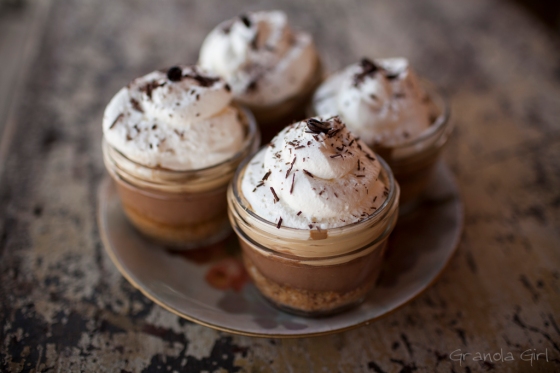
Mini Mocha Latte Cheescakes

Mocha Latte Cheesecake, requested by my brother for his birthday. 🙂 Coffee and chocolate are two major staples in my house and both go so well together!! So I created this cheesecake a while back combining my 2 favorite beans. 😉
4 layers compose this cheesecake. Starting off with a thick buttery crust, then a rich chocolate cheesecake, add a layer of coffee, and top with freshly whipped cream and bittersweet chocolate shavings! This recipe can be made in either a 10inch spring form cheesecake pan or 16(approximate) mason jars!

Original Recipe Yield 16 servings

Ingredients

  • 2 1/2 cups  Graham Cracker Crumbs
  • 1/2 cup butter, melted
  • 2/3 cup sugar
  • 5 (250 g) packages cream cheese, softened
  • 1 cup sugar
  • 3 tablespoons flour
  • 1 tablespoon vanilla
  • 2 tsp instant coffee
  • 1 cup sour cream
  • 8 oz melted chocolate (I have used an entire 12 oz bag before too! Just depends on how much chocolate you prefer.)
  • 4 eggs
Latte Topping
  • 12oz cream cheese softened
  • 2 cups powder sugar
  • 1 tbs milk
  • 3 tsp instant coffee
  • fresh whipped cream
  • bittersweet Chocolate Shavings

Directions

  1. Heat oven to 325 degrees F if using a silver 9 inch spring form pan (or to 300 degrees F if using a dark nonstick 9-inch springform pan). Mix crumbs, sugar, and butter; press firmly onto bottom of pan or mason jars. Bake 10 minutes.
  2. Beat cream cheese, sugar, and flour in large bowl with electric mixer on medium speed until well blended. Dissolve instant coffee in vanilla add to cream cheese mixture. Add sour cream; mix well. Add eggs, one at a time,  mixing on low speed after each addition just until blended. Then add melted chocolate, Pour over crust.
  3. Bake 1 hour 10 minutes for 10inch round spring form or 20 minutes for the mason jars (or until center is almost set). Run knife or metal spatula around rim of pan to loosen cake and cool.
  4. Blend together all topping ingredients until smooth and spread evenly over cheesecake. Refrigerate until chilled
  5. Top with whipped cream and chocolate shavings.
  6. Enjoy!

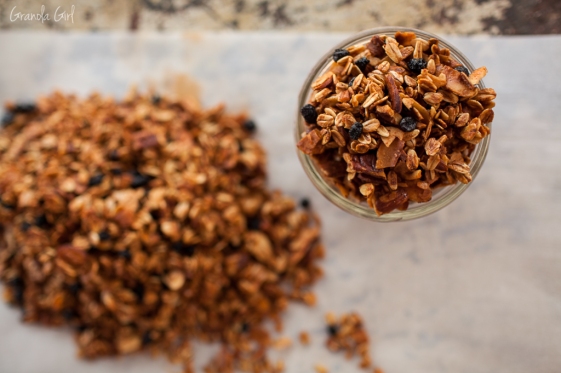
Granola

Granola! I love it. After several failed batches, I came up with this recipe a few years ago.  So crunchy and sweet, it can be quite addictive. 🙂 Any dried fruit works wonderfully but my personal favorite is dried blueberries!

Yields: about 6 cups granola

Ingredients

  • 3 cups rolled oats
  • 3/4 cup un-sweetened coconut
  • 1 cup pecans (slightly chopped)
  • 1 cup slivered almonds
  • 1/4 cup butter (melted)
  • 1/2 cup honey
  • 1/2 cup pure maple syrup
  • 2 tsp vanilla extract
  • 1 1/2 tsp cinnamon
  • 1 tsp salt
  • 1 cup dried blueberries or any other dried fruit
Directions
  1. Preheat oven to 290°
  2. Combine oats, coconut, pecans, almonds, cinnamon, and salt in a large bowl. Pour in butter, syrup, honey,  and vanilla. Toss until combined!
  3. Spread evenly over a large cookie sheet. Bake for approximately 1 hour(or until golden), turning granola every 20 minutes.  Granola will be golden brown when it it is ready to come out of the oven.
  4. Remove from oven and stir in dried fruit. Allow to cool completely!
  5. Enjoy!

Smoothies | Summertime

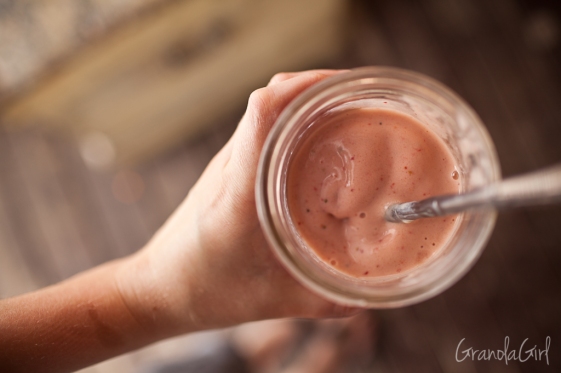
It’s summer!! 🙂 Nothing goes better with summer than smoothies…. well actually icecream goes better but smoothies are the next best thing! 😉
If they are made right, smoothies are not only tasty but also an extremely good way to get a couple servings of fruit in. This morning I came up with the perfect mix!! A pretty simple combination of strawberries, peaches, and bananas but I added a punch of flavor with pineapple concentrate. 🙂 Add a bit of organic cream top yogurt and a splash of vanilla for a deliciously creamy texture… almost taste like a milkshake! OK, so this recipe isn’t rocket science BUT it’s good! What’s your favorite smoothie combination?

Yields: 1 smoothie

Ingredients

  • 2/3 cup frozen sliced strawberries
  • 1/3 cup frozen chopped peaches
  • 1/2 ripened banana
  • 1/4 cup cream top yogurt(or regular plain yogurt)
  • 1/4 cup milk
  • 2 tbsp frozen pineapple concentrate (100% fruit juice)
  • 1/2 tsp pure vanilla extract
Directions
  1. Place all ingredients in blender, starting with fruit and finishing with yogurt and milk. Blend until completely smooth!
  2. Pour into favorite cup, add a colorful straw and enjoy! 🙂
HAPPY SUMMER!

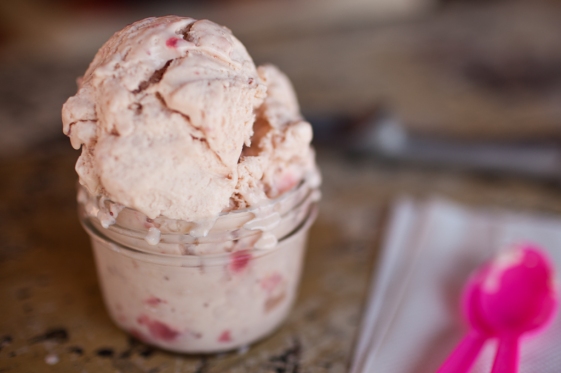
Strawberry Honey Icecream with Roasted Coconut

Summer is almost here which the perfect season for Icecream (actually all seasons are perfect when it comes to icecream)! 🙂  Seeing that Strawberries are fresh this time of year and I hadn’t made a batch of icecream since last August, I decided to experiment! I knew I wanted honey for the sweetness in this batch of icecream (we attempt to stay away from white sugar plus there is something about the flavor of honey that makes everything taste so much better) and  I also wanted to add a little more depth  to the flavor of the icecream, so I made a custard base and  decided to add toasted coconut to the mix.

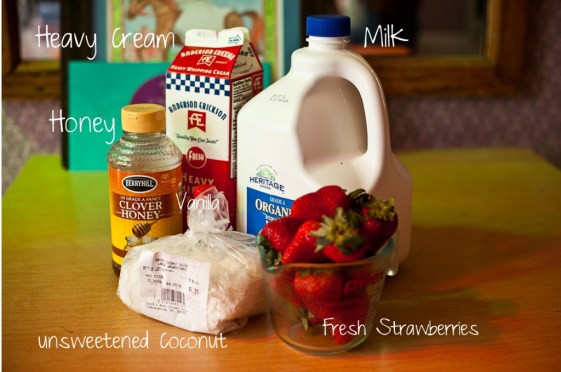
My ingredient picture is missing the eggs and Salt… I completely forgot! 😉

Yields: 12 Delightfully delicious AND healthy Peanut Butter Cups

Ingredients

  • 2 pints fresh strawberries hulled and halved
  • 2 cups heavy cream
  • 1 cup whole milk
  • 4 egg yolks lightly beaten
  • 2/3 cup honey
  • 2 tsp pure vanilla extract
  • 1/4 tsp salt
  • 1 cup toasted coconut
Directions
  1. Preheat oven to 350°.  Place hulled and halved strawberries on parchment lined pan, sprinkle with a pink of salt and roast for 25 minutes. Remove from oven and allow to cool.
  2. Meanwhile prepare the custard. Place eggs, honey, and salt in a medium sized bowl. In a large sauce pan bring heavy cream and milk to a simmer, remove from heat and slowly add 1 cup of cream to the egg mixture whisking constantly until combine. Add remaining cream to egg mixture and pour mixture back into the saucepan. Over low heat, stirring constantly, heat until the mixture (custard) thickens and will coat the back of a metal spoon with a thin film, approximately 7 to 10 minutes. Remove from heat and let custard cool. Add vanilla. Cover and refrigerate until thoroughly chilled, at least 2 hour.
  3. Once cooled, transfer the mixture into your icecream maker and churn according to your icecream maker instructions. When the mixture is 2/3 of the way complete add in cooled strawberries and coconut. Once icecream is completely set(churned/frozen 🙂 place in an air tight container and allow to freeze until firm!
  4. ENJOY!

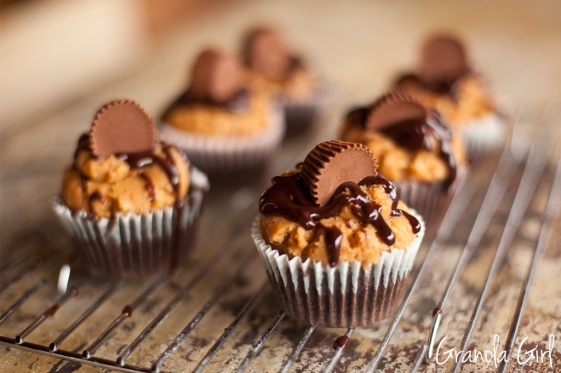
Peanut Butter Brownie Cupcakes


It is Sunday again, which means I get to make dessert!! (: I had seen Peanut Butter Brownie Cupcakes when browsing pinterest and knew I had to give them a try. The only problem is the recipe called for brownie mix and corn syrup.  So, I decided to take the concept and create my own recipe!
Extremely rich and super chocolatey, definitely a fun and very sweet Sunday dessert!

Yields: 16 cupcakes

Ingredients

Brownie Batter:

  • 3/4 cup butter
  • 1-1/2 cups white sugar
  • 3 eggs
  • 1-1/2 teaspoons vanilla extract
  • 1/2 cup unsweetened cocoa powder
  • 3/4 cup all-purpose flour
  • 1 tsp instant coffee
  • 1/4 teaspoon salt
  • 1/4 teaspoon baking powder
  • 16 miniature peanut butter cups

Icing:

  • 1/2 c creamy unsweetened All-natural Peanut Butter(or you can use regular creamy peanut butter)
  • 1/4 c butter, softened
  • 2 c powdered sugar, sifted
  • 3 tbsp milk
  • 1/2 tsp pure vanilla
  • 1/8 tsp salt

Ganache:

  • 1/2 cup heavy cream
  • 2 tbsp butter(softened)
  • 1 cup simi-sweet chocolate chips
  • 1/2 tsp instant coffee
  • 1/2 tsp vanilla

Topping:

  • 12-14 miniature peanut butter cups
  1. Preheat oven to 350°F. Place paper baking cups in each of 12 regular-size muffin cups. Remove foil and cups from candy pieces. Set aside.
  2. Prepare brownie batter: Melt butter in sauce. Add remaining brownie ingredients with exception to the peanut butter cups.  Fill each muffin cup up about 1/2 full with batter. Place 1 unwrapped candy piece, upside down, on top of batter in each cup. Lightly tap piece down into batter.
    -Bake 15-20 minutes or until toothpick inserted in center of cup comes out almost clean. Cool 5 minutes; remove from pan. Place on wire rack; cool completely.
  3. Make icing by placing peanut butter and butter into medium bowl. Beat with an electric mixer on medium speed until light and creamy; scrape bowl. Add powdered sugar, milk, vanilla and salt. Beat on low speed 1 minute; scrape bowl. Beat on medium speed until smooth and creamy. Pipe about 2 tablespoons of icing on each cupcake leaving the edge un-iced.
  4. Prepare ganache: in a small saucepan over medium heat, warm the heavy cream and butter until it just comes to a boil.  Place chocolate, espresso, and vanilla in a heat safe bowl. Pour the hot cream over the chocolate and allow it to sit for about 5 minutes. Whisk the cream and chocolate until smooth and thoroughly combined.  Do not let the glaze sit for too long or it will harden up before you spoon it over the frosting. drizzle the glaze on the tops of the frosted cupcakes, allowing it to drip down the sides a little bit(you may not want use all the ganache as I only used about 1/2 of the recipe).
  5. Top each cupcake with a peanut butter cup.
  6. Enjoy!!