Browsing Category

Dessert

Vanilla Buttercream Cupcakes ♥

Vanilla Cupcakes 8 © GranolaGirlBakes.com

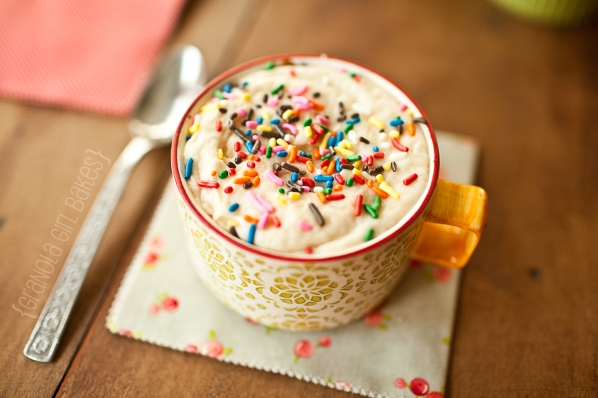
I  ♥ Cupcakes!! Add sprinkles to the mix and you have the perfectly perky dessert. 🙂 Last night I made Vanilla Buttercream Cupcakes. I just couldn’t help myself! The brand new container of sprinkles was calling out to me!! 😉 The base is a delightful Cream Cheese pound cake(sounds way too heavy but it really isn’t!) and the icing a sweet and rich buttercream. Yes, these are definitely sweet and you will need a few cups of coffee to finish one off but definitely fun to make!

Yields: 2 dozen 6oz glass ramekins or mugs

Ingredients

  • 1 1/2 cups (3 sticks) unsalted butter, room temperature
  • 1 bar (8 ounces) cream cheese, room temperature
  • 3 cups sugar
  • 6 large eggs
  • 1 teaspoon vanilla extract
  • 3 cups all-purpose flour
  • 2 teaspoons salt

Directions

  1. Preheat oven to 350 degrees. With an electric mixer, beat butter and cream cheese until smooth. Add sugar; beat until light and fluffy, about 5 minutes. Add eggs, one at a time, beating well after each addition. Mix in vanilla. With mixer on low, add flour and salt in two additions, beating until just combined.
  2. Generously coat 2 dozen glass ramekins or mugs(be sure they are bake-proof!) with butter and dust with flour; immediately pour in batter (usually 2 ice-cream scoopers full).
  3. Bake until golden and a toothpick inserted in the centers comes out almost clean, 20-25 minutes.
  4. Cool completely.
  5. Pipe on icing(recipe bellow) and top immediately with sprinkles!
  6. Brew a rather large pot of coffee, sit down with a few of your favorite people, and enjoy!! (:

BUTTERCREAM frosting:

  • 3/4 cup butter softened
  • 1/2 cup heavy cream (milk can be substituted)
  • 1TBS vanilla
  • 1/2tsp almond extract
  • 5-6 cups powder sugar
  1. Cream together butter, cream, vanilla, and almond extract. Add powder sugar 1 cup at a time until icing reaches the right consistency.
  2. Pipe onto cooled cupcakes and enjoy!

Vanilla Cupcakes 7 © GranolaGirlBakes.com Vanilla Cupcakes 2 © GranolaGirlBakes.com Vanilla Cupcakes 4 © GranolaGirlBakes.com

Molten Lava Cakes

Molten Lava Cakes By GranolaGirlBakes.com

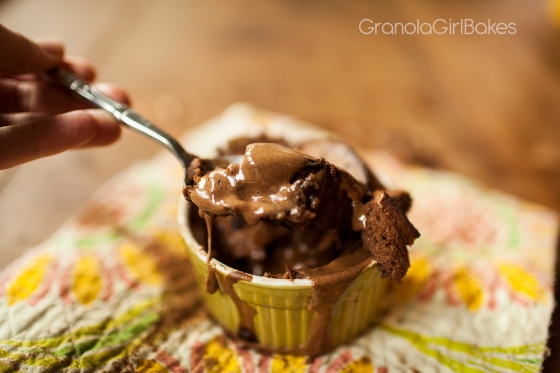
Okay, so our “no-gluten, no-dairy, no-sugar” diet hasn’t been going to great lately. Obviously! 🙂 Molten Lava Cakes…. they are healthy…. really they are! Chocolate is full of antioxidants and I hear it is a belly flattener. 😀

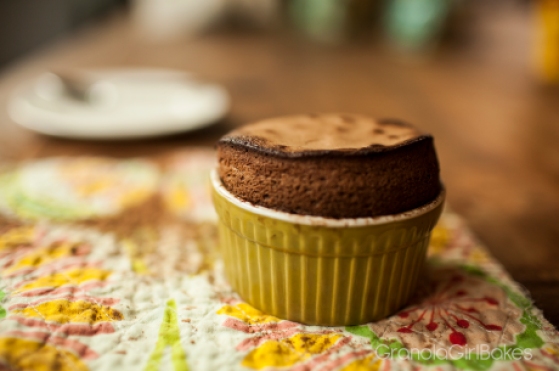
Okay, so these are dangerously delicious and really quick to prepare. A chocolate cake that has a slightly gooey center. Serve hot with ice-cream and you have the world’s best and quickest desert! I usually have to make 14 little cakes to satisfy my family but I have revised the recipe to make 6 generous Lava Cakes. (:

Original Recipe Yield 6 cakes

Ingredients

  • unsweetened baking cocoa
  • 6 oz semi-sweet (or dark) chocolate chips
  • 1/2cup plus 2tbs butter
  • 3 whole eggs
  • 3 egg yokes
  • 1 1/2 cup powder sugar
  • 1/2 cup flour
  • 1tsp vanilla
  • dash salt

Directions

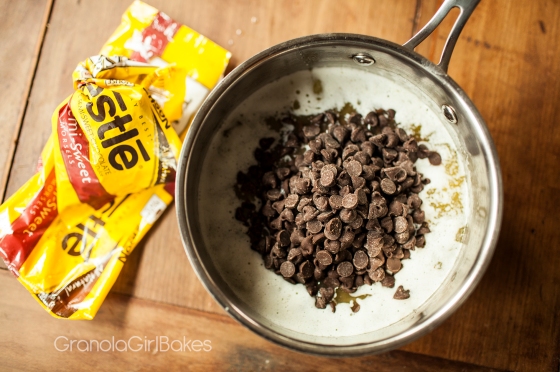
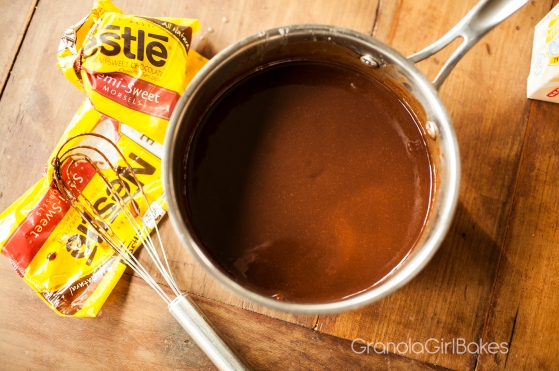
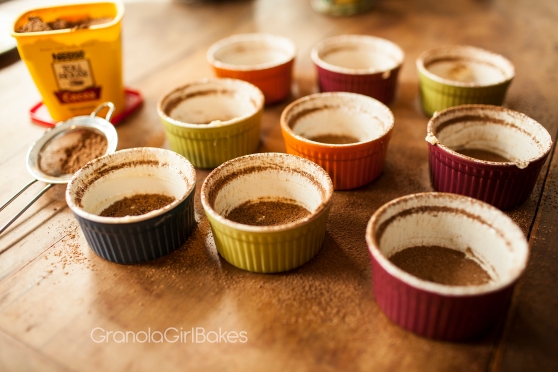
  1. Heat oven to 450° F. Grease bottoms and sides of 6 (6oz) custard cups or mason jars with butter. Dust with cocoa powder. In a sauce pan, melt butter and chocolate chips. Allow to cool slightly.
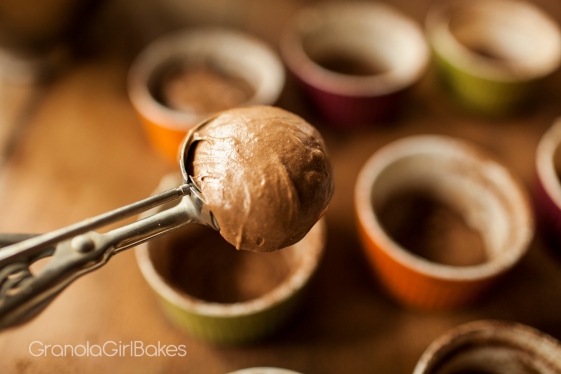
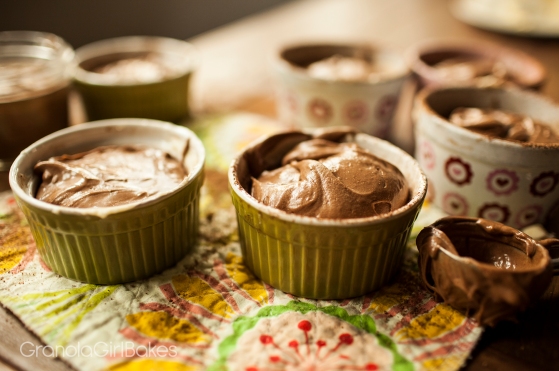
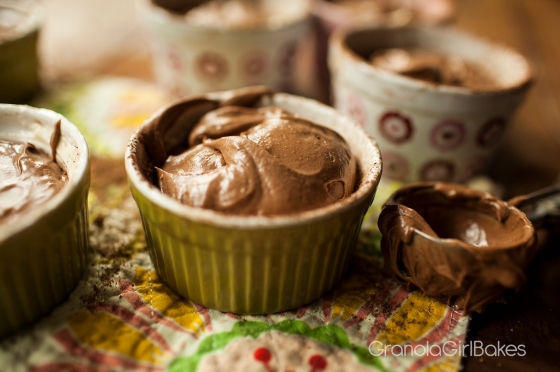
  2. In large bowl, beat whole eggs and egg yolks with wire whisk or eggbeater until well blended. Beat in 1 1/2 cup powder sugar. Beat in melted chocolate mixture, flour, salt, and vanilla. Divide batter evenly between cups. I find an icecream scoop works wonderfully for this!
  3. Bake for 12-14 minutes or until sides are set and centers are still soft(top will puff and crack.) Let stand for 3 minutes but NO LONGER! 🙂 They are best warm.
  4. Serve with icecream and ENJOY!

1.12.8 1.12.7 1.12.6 1.12.5 1.12.4 1.12.3 1.12.2 1.12.1 1.12.12 1.12.11

Pilgrim Pies {re-blogged}

1.5.2

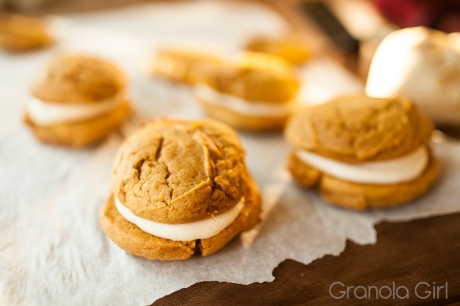
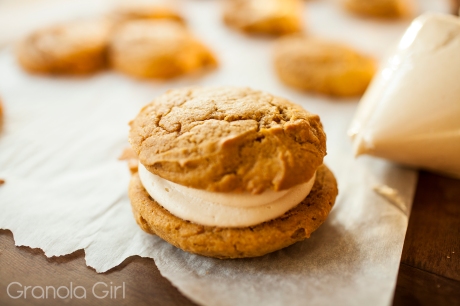
I made these delightful pies tonight. Yes, I have blogged these before but couldn’t help re-post them! Perfect combination of pumpkin & cream cheese frosting all bound up into a little pie. 🙂

Original Recipe Yield 12-15 “pies”

Ingredients

  • 2 eggs
  • 2 cups brown sugar
  • 1 cup softened butter
  • 1 tsp vanilla
  • 1 (15oz) can Pureed Pumpkin or 2 cups freshly pureed pumpkin(I used freshly pureed)
  • 3 cups flour
  • 1tbs pumpkin pie spice
  • 1 tsp baking soda
  • 1 tsp baking powder
  • 1 tsp salt
Filling
  • 4 oz cream cheese – softened
  • 1/2 cup butter – softened
  • 2tsp vanilla
  • 4-5 cups powder sugar

Directions

  1. Heat oven to 350 degrees .
  2. Beat eggs, sugar, oil, vanilla, and pumpkin  in large bowl. Add flour, pumpkin pie spice, soda, powder, and salt until well combine.
  3. Using an ice cream scoop(my favorite kitchen tool) or large spoon, spoon 1/4 cup dallops onto ungreased cookie sheet 1 1/2 inches apart. Bake for 11-14 minutes or until bottoms are golden. Let cool on tray for 5 minutes then remove from tray and let  cool completely on parchment.
  4. Prepare filling. Combine all filling ingredients and blend on high speed until smooth and fluffy!
  5. Pipe filling onto 1 cookie and top with the second cookie. Continue with remaining cookies and Enjoy!

1.5 1.5.1

Salted Caramel Mocha Cupcakes

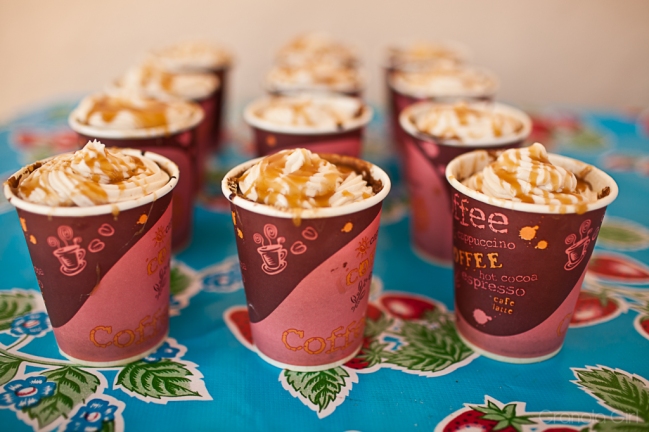
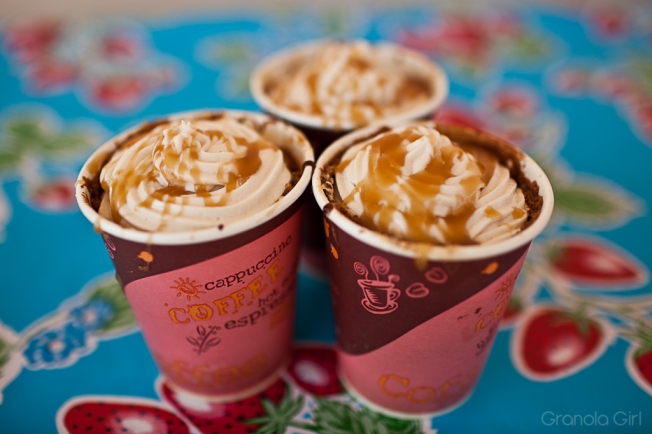
This is the week of my sister’s birthday and I am excited!! 🙂 So, we decided to give her a full week of celebration! Today I made Micah Salted Caramel Mocha Cupcakes!!

Chocolate pound cake, beneath a layer of coffee, caramel, ganache, and salted caramel frosting. Top it off with a caramel drizzle and you have a cupcake that is likely to knock you out! Yes, I know. VERY RICH! Don’t try to eat the whole cupcake in one setting without an entire pot of coffee. 😉 And don’t let the layers intimidate you. The preparation really isn’t time-consuming at all!

I used 8oz disposable coffee cups(un-waxed, paper cups. Not plastic!) but you can use coffee mugs or muffin cups! 🙂

Original Recipe makes 13 rather large cupcakes!

Cake

  • 1 1/2 cups butter, softened
  • 3 cups white sugar
  • 5 eggs
  • 2 teaspoons vanilla extract
  • 2 teaspoons instant coffee granules dissolved in 1/4 cup hot water
  • 1 cup buttermilk
  • 2 cups all-purpose flour
  • 3/4 cup unsweetened cocoa powder
  • 1/2 teaspoon baking powder
  • 1 teaspoon salt

Directions

  1. Preheat oven to 350 degrees F. Grease and flour a 13 8oz coffee cups. Mix together the flour, cocoa, baking powder, and salt. Set aside.
  2. In a large bowl, cream together the butter and sugar until light and fluffy. Beat in the eggs one at a time, then stir in the vanilla. Beat in the flour mixture alternately with the dissolved coffee and buttermilk. Pour batter into prepared pan.
  3. Bake in the preheated oven for 20-25 minutes, or until a toothpick inserted into the center of the cake comes out clean. Let cool in pan for 10 minutes.

After cakes have cooled, add latte layer. Latte Layer:

  • 1 pkg cream cheese (softened)
  • 2 tbsp milk
  • 1 tbsp instant coffee
  • 2 cups powder sugar
  1. Beat all ingredients on high until light and fluffy!
  2. Spread evenly over each cupcake.

Next spread 3/4 cup caramel evenly over all 13 cupcakes.

Then Ganache:

  • 8oz Semi-sweet Chocolate Chips
  • 2 tbsp butter
  • 3/4 cup heavy cream
  • 1 tsp vanilla
  1. Place chocolate chips and vanilla in a heat proof bowl
  2. Bring butter and heavy cream to a boil. Then pour over chocolate chips and allow to set for about 4 minutes.
  3. Whist until smooth and pour evenly over cupcakes!

Now it’s time for the icing!

  • 1/2 cup caramel
  • 1 tsp salt
  • 2 sticks butter (softened)
  • 1 pkg softened cream cheese
  • 4-5 cups powder sugar
  1. Cream together the butter and cream cheese.
  2. Pour in the salt & caramel. Beat until combined.
  3. Slowly add the powdered sugar, and beat for a few minutes until really light and fluffy. Pipe over Ganache!

Last thing to do is drizzle with caramel, find 13 hungry friends, and enjoy!! 🙂


Seriously Delicious Hot Chocolate

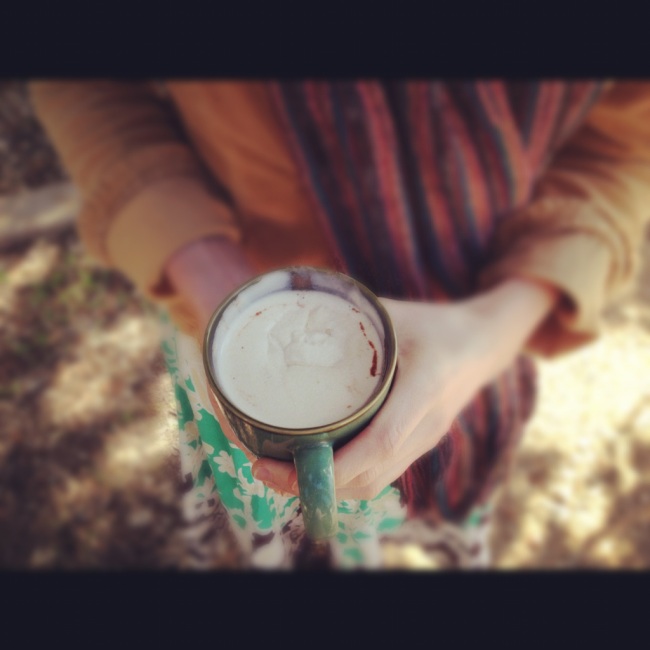
The last 2 days have been COLD. Even colder seeing our heater is down for repair. We weren’t expecting such extremely chilly weather but after the scorching summer, we are loving it! So what goes with super cold weather better than a cup of Hot Chocolate and a few layers of sweaters?? 🙂

Hot Chocolate is a necessity for the winter months and I had been looking for the perfect Hot Chocolate recipe for years.  Finally found it! In the words of my sister, Grace, “this hot chocolate  is like drinking a brownie!” I found the original recipe on Cooking for Seven a year and a half or so ago and with only a few minor changes, we have been drinking it ever since!
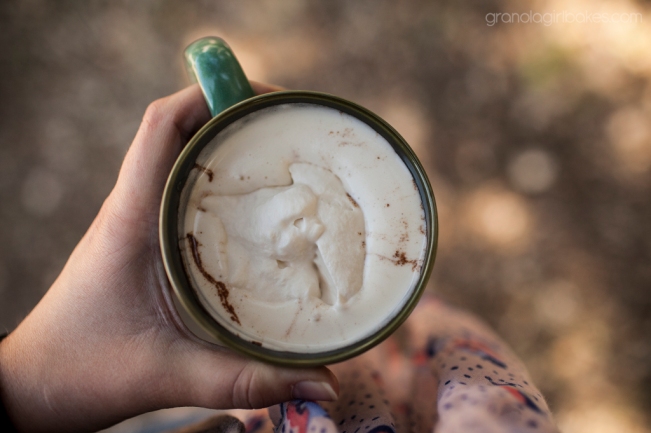
Sweetened with Pure Maple Syrup and topped off with a maple whipped cream, yes, this recipe is RICH…. So rich, you may have a hard time drinking an entire serving! But y’all are sure to love it. 🙂

Original Recipe 5-6 cups of cocoa!

Ingredients

  • 3 1/2 cups whole milk(I usually add up to 1c more depending on thickness)
  • 1/2 cup heavy cream
  • 8 ounces chopped unsweetened chocolate
  • 6 tbs pure maple syrup(might need more if you prefer your cocoa a little sweeter!)
  • 2 tsp pure vanilla extract
  • 1/8 tsp salt

Directions:

  1.  In a medium saucepan, bring the milk and cream to a low simmer over medium heat, whisking occasionally.
  2.  Add the chocolate, maple syrup, vanilla, and salt. Whisk vigorously until all of the chocolate has melted. Cook for an additional 4 minutes, whisking constantly.

Maple Whipped Cream

Ingredients:

  • 1/2 cup heavy whipping cream
  • 1-2 tbs maple syrup (more if you like your whipped cream very sweet)
  • 1/2 teaspoon vanilla extract

Directions:

  1. Place all ingredients in a large bowl and beat until stiff.
  2. Add a dollop or two or four 😉 on your cup of cocoa and enjoy!
Baklava!

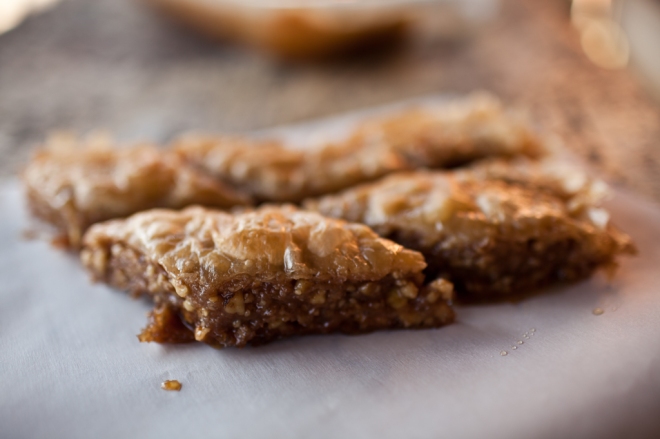
Baklava,  Turkish in origin and absolutely delicious! I usually make this in the winter but when cleaning out my freezer I found 2 essential ingredients for a batch. Since when did I buy a pound of phyllo (it must have been last winter…)? And since when do we have a spare pound of walnuts that are just waiting to be used?? Plus, I noticed I got a little over-zealous when buying honey last shopping trip. I had quite a stash of the golden goodness just yelling, “USE ME”! 😉  Seeing that everything was falling into alignment, I decided it was “meant to be” for me to make Baklava! 🙂
I made my first batch of baklava 8ish years ago after a local store that sold it closed. I still use the original recipe found here but the only thing is I am not afraid of butter and live by the motto, “everything better with butter!” 😉 So, I do use an addition stick of butter in my baklava. But I will post the original recipe. Just remember, you might need additional butter!
The hardest part of this recipe is waiting 24 hours for the Baklava to set without having some-one sneak a piece. But once it is finished, fix yourself a cup of Turkish Coffee, grab a piece of Baklava, and perhaps a scoop of ice cream on the side :), then enjoy!
Ingredients

  • 1 lb Walnuts – Finely Chopped
  • 1/2 C. Sugar
  • 2 tsp Cinnamon
  • 1.5 C. Butter (3 sticks), Melted
  • 1 Package Frozen Phyllo Dough (16 oz) Thawed
  • 1 C. Sugar
  • 1 C. Water
  • 1 Tbsp Lemon Juice
  • 1 C. Honey (Net weight 12 oz.)
  • 1/2 tsp Vanilla

Directions

  1. Preheat the oven to 300 degrees.
  2. Combine and set aside walnuts, 1/2 cup sugar, and cinnamon
  3. Using a pastry brush, lightly brush the bottom and sides of a 10×14″ (about 1-2″ deep) pan with melted butter.
  4. Open the phyllo dough and layer 6 whole leafs (or 12 half leafs) in the pan, buttering each layer as you go. (The edges will extend over the side.)
  5. Spread 1 cup of the walnut mixture.
  6. If your phyllo dough comes in full sheets, cut the remaining phyllo dough in half.
  7. Layer 8 half sheets — butter each layer. Each sheet will be an inch or so short, so stagger the sheets from corner to corner to cover the whole pan. I use a pattern so I don’t forget how many layers I’ve put down, but it’s even easier if you have a friend help!
  8. Spread 1 cup of the walnut mixture.
  9. Repeat 8 sheets and walnut mixture twice. You will end up with 4 layers of nuts.
  10. Layer the remaining half sheets on top — butter each layer.
  11. Brush the top with the remaining butter.
  12. Trim the edges off.
  13. Cut halfway through the layers using the (new and improved right-hand or left-handers) diagram to the right. See my baklava FAQ page for more tips on cutting. (Note: Do NOT cut from corner to corner.) This is done now since it will be very fragile after it’s been baked.
  14. Bake 1 hour or until golden brown.
  15. 15 minutes before the baklava should be done, mix 1 cup sugar, water, and lemon juice in a sauce pan.
  16. Cook sauce over a medium heat, stirring occasionally for 15 minutes.
  17. Remove from heat, add the honey and vanilla, and stir until well blended.
  18. Remove the baklava from the oven and finish cutting through the layers.
  19. Pour the sauce over the hot baklava.
  20. Cool. Let it sit for at least 24 hours (lightly covered — but not in the refrigerator) — longer if you can stand it!
  21. ENJOY!!


Mini Mocha Latte Cheescakes

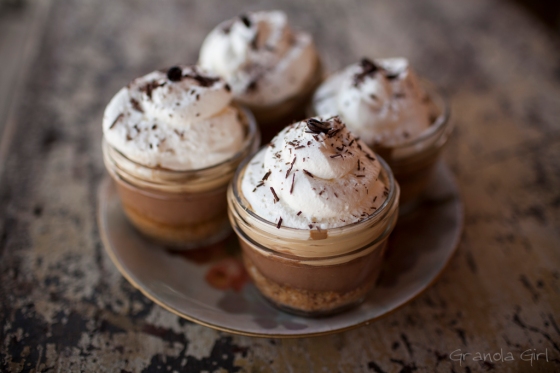
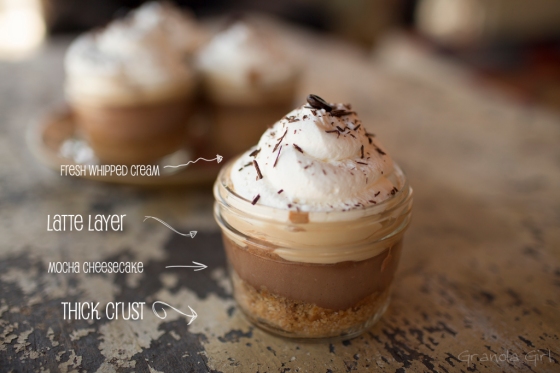
Mocha Latte Cheesecake, requested by my brother for his birthday. 🙂 Coffee and chocolate are two major staples in my house and both go so well together!! So I created this cheesecake a while back combining my 2 favorite beans. 😉
4 layers compose this cheesecake. Starting off with a thick buttery crust, then a rich chocolate cheesecake, add a layer of coffee, and top with freshly whipped cream and bittersweet chocolate shavings! This recipe can be made in either a 10inch spring form cheesecake pan or 16(approximate) mason jars!

Original Recipe Yield 16 servings

Ingredients

  • 2 1/2 cups  Graham Cracker Crumbs
  • 1/2 cup butter, melted
  • 2/3 cup sugar
  • 5 (250 g) packages cream cheese, softened
  • 1 cup sugar
  • 3 tablespoons flour
  • 1 tablespoon vanilla
  • 2 tsp instant coffee
  • 1 cup sour cream
  • 8 oz melted chocolate (I have used an entire 12 oz bag before too! Just depends on how much chocolate you prefer.)
  • 4 eggs
Latte Topping
  • 12oz cream cheese softened
  • 2 cups powder sugar
  • 1 tbs milk
  • 3 tsp instant coffee
  • fresh whipped cream
  • bittersweet Chocolate Shavings

Directions

  1. Heat oven to 325 degrees F if using a silver 9 inch spring form pan (or to 300 degrees F if using a dark nonstick 9-inch springform pan). Mix crumbs, sugar, and butter; press firmly onto bottom of pan or mason jars. Bake 10 minutes.
  2. Beat cream cheese, sugar, and flour in large bowl with electric mixer on medium speed until well blended. Dissolve instant coffee in vanilla add to cream cheese mixture. Add sour cream; mix well. Add eggs, one at a time,  mixing on low speed after each addition just until blended. Then add melted chocolate, Pour over crust.
  3. Bake 1 hour 10 minutes for 10inch round spring form or 20 minutes for the mason jars (or until center is almost set). Run knife or metal spatula around rim of pan to loosen cake and cool.
  4. Blend together all topping ingredients until smooth and spread evenly over cheesecake. Refrigerate until chilled
  5. Top with whipped cream and chocolate shavings.
  6. Enjoy!
Strawberry Honey Icecream with Roasted Coconut

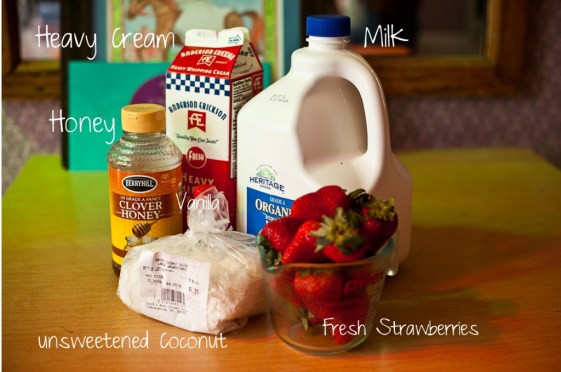
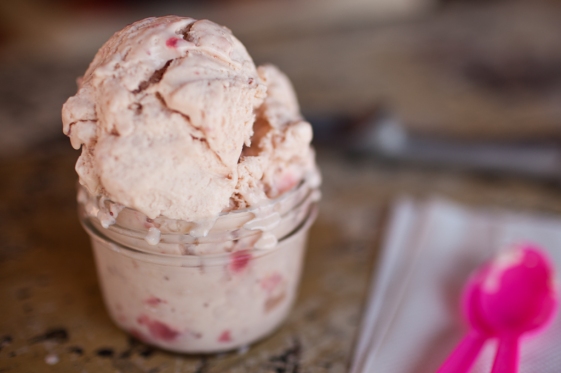
Summer is almost here which the perfect season for Icecream (actually all seasons are perfect when it comes to icecream)! 🙂  Seeing that Strawberries are fresh this time of year and I hadn’t made a batch of icecream since last August, I decided to experiment! I knew I wanted honey for the sweetness in this batch of icecream (we attempt to stay away from white sugar plus there is something about the flavor of honey that makes everything taste so much better) and  I also wanted to add a little more depth  to the flavor of the icecream, so I made a custard base and  decided to add toasted coconut to the mix.

My ingredient picture is missing the eggs and Salt… I completely forgot! 😉

Yields: 12 Delightfully delicious AND healthy Peanut Butter Cups

Ingredients

  • 2 pints fresh strawberries hulled and halved
  • 2 cups heavy cream
  • 1 cup whole milk
  • 4 egg yolks lightly beaten
  • 2/3 cup honey
  • 2 tsp pure vanilla extract
  • 1/4 tsp salt
  • 1 cup toasted coconut
Directions
  1. Preheat oven to 350°.  Place hulled and halved strawberries on parchment lined pan, sprinkle with a pink of salt and roast for 25 minutes. Remove from oven and allow to cool.
  2. Meanwhile prepare the custard. Place eggs, honey, and salt in a medium sized bowl. In a large sauce pan bring heavy cream and milk to a simmer, remove from heat and slowly add 1 cup of cream to the egg mixture whisking constantly until combine. Add remaining cream to egg mixture and pour mixture back into the saucepan. Over low heat, stirring constantly, heat until the mixture (custard) thickens and will coat the back of a metal spoon with a thin film, approximately 7 to 10 minutes. Remove from heat and let custard cool. Add vanilla. Cover and refrigerate until thoroughly chilled, at least 2 hour.
  3. Once cooled, transfer the mixture into your icecream maker and churn according to your icecream maker instructions. When the mixture is 2/3 of the way complete add in cooled strawberries and coconut. Once icecream is completely set(churned/frozen 🙂 place in an air tight container and allow to freeze until firm!
  4. ENJOY!

Peanut Butter Brownie Cupcakes


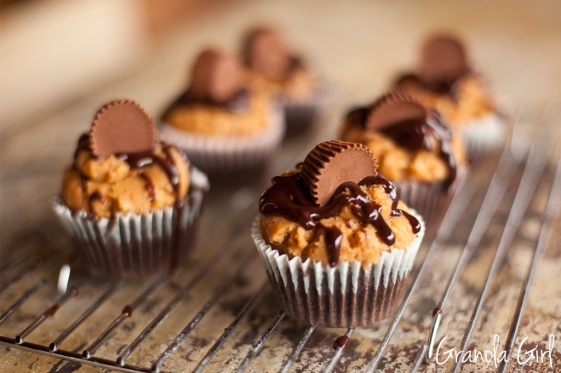
It is Sunday again, which means I get to make dessert!! (: I had seen Peanut Butter Brownie Cupcakes when browsing pinterest and knew I had to give them a try. The only problem is the recipe called for brownie mix and corn syrup.  So, I decided to take the concept and create my own recipe!
Extremely rich and super chocolatey, definitely a fun and very sweet Sunday dessert!

Yields: 16 cupcakes

Ingredients

Brownie Batter:

  • 3/4 cup butter
  • 1-1/2 cups white sugar
  • 3 eggs
  • 1-1/2 teaspoons vanilla extract
  • 1/2 cup unsweetened cocoa powder
  • 3/4 cup all-purpose flour
  • 1 tsp instant coffee
  • 1/4 teaspoon salt
  • 1/4 teaspoon baking powder
  • 16 miniature peanut butter cups

Icing:

  • 1/2 c creamy unsweetened All-natural Peanut Butter(or you can use regular creamy peanut butter)
  • 1/4 c butter, softened
  • 2 c powdered sugar, sifted
  • 3 tbsp milk
  • 1/2 tsp pure vanilla
  • 1/8 tsp salt

Ganache:

  • 1/2 cup heavy cream
  • 2 tbsp butter(softened)
  • 1 cup simi-sweet chocolate chips
  • 1/2 tsp instant coffee
  • 1/2 tsp vanilla

Topping:

  • 12-14 miniature peanut butter cups
  1. Preheat oven to 350°F. Place paper baking cups in each of 12 regular-size muffin cups. Remove foil and cups from candy pieces. Set aside.
  2. Prepare brownie batter: Melt butter in sauce. Add remaining brownie ingredients with exception to the peanut butter cups.  Fill each muffin cup up about 1/2 full with batter. Place 1 unwrapped candy piece, upside down, on top of batter in each cup. Lightly tap piece down into batter.
    -Bake 15-20 minutes or until toothpick inserted in center of cup comes out almost clean. Cool 5 minutes; remove from pan. Place on wire rack; cool completely.
  3. Make icing by placing peanut butter and butter into medium bowl. Beat with an electric mixer on medium speed until light and creamy; scrape bowl. Add powdered sugar, milk, vanilla and salt. Beat on low speed 1 minute; scrape bowl. Beat on medium speed until smooth and creamy. Pipe about 2 tablespoons of icing on each cupcake leaving the edge un-iced.
  4. Prepare ganache: in a small saucepan over medium heat, warm the heavy cream and butter until it just comes to a boil.  Place chocolate, espresso, and vanilla in a heat safe bowl. Pour the hot cream over the chocolate and allow it to sit for about 5 minutes. Whisk the cream and chocolate until smooth and thoroughly combined.  Do not let the glaze sit for too long or it will harden up before you spoon it over the frosting. drizzle the glaze on the tops of the frosted cupcakes, allowing it to drip down the sides a little bit(you may not want use all the ganache as I only used about 1/2 of the recipe).
  5. Top each cupcake with a peanut butter cup.
  6. Enjoy!!

Cuccidati | Sicilian Fig Cookies

Cuccidati! The first time I tried an authentic Cuccidati was in a very small yet delicious Mediterranean Cafe nestled deep in New York City. The first bite I was taken!  For the last 1.5 years I have determined myself to make a batch. It just so happens that I had an extra pound of dried figs(dried figs are a staple in my house) so today was the day I decided to experiment!

The taste is very similar to a fig newton in my opinion. The fig filling is sweet and rich and the cookie shell buttery! After searching out a good recipe I ended up combining a few recipes to create the cookie. I decided to use 100% whole wheat for the dough and honey for the filling. Many recipes called for a variety of dried fruit & nuts but I decided to stick with just figs for a basic Sicilian fig cookie! Perhaps I will try a few different fruit combinations next time. (:
Yields: 2-3 dozen cookies

Ingredients

For filling

  • 1lb dried mission figs
  • 1/2 cup orange juice
  • 3/4 cup honey
  • zest of 1 orange
  • 1 tsp vanilla

For pastry dough

  • 4 cups  flour (wheat or white)
  • 3/4 cup brown sugar
  • 1 tablespoon baking powder
  • 1 teaspoon salt
  • 2 sticks (1 cup) cold unsalted butter, cut into 1/2-inch cubes
  • 2 large eggs, lightly beaten
  • 1/2 cup whole milk
  • 1 1/2 teaspoons vanilla
  • 1 teaspoon finely grated fresh lemon zest

Directions

Make filling:
Soak figs in orange juice, orange zest, honey, and vanilla. Allow to set covered for 4 hours. Once soaked, puree in food processor. Refrigerate for 3 hours.

Make dough:
Whisk together flour, sugar, baking powder, and salt in a large bowl. Add butter and blend with your fingertips or a pastry blender (or pulse in a food processor) just until most of mixture resembles coarse meal with some small (roughly pea-size) butter lumps. Add eggs, milk, vanilla, and zest and stir with a fork until a soft dough forms. Halve dough and gather each half into a ball, then flatten each half into a rough 6- by 4-inch rectangle between sheets of plastic wrap. Chill until firm, at least 6 hours.
Form cookies:
Preheat oven to 350°F.
Roll out 1 rectangle of dough (keep remaining dough chilled) into a 15- by 14-inch rectangle on a well-floured surface with a floured rolling pin. Trim to a 13- by 10-inch rectangle (chill trimmings), then cut into 4 (10- by 3 1/4-inch) strips. Arrange 1/3 cup filling in a 1-inch-wide log lengthwise down center of each strip, then fold sides of each strip up over filling to enclose it, pinching edges together to seal. Turn rolls seam-sides down and press gently to flatten seams. Cut logs crosswise with a floured knife into 1 1/2-inch-wide slices and arrange 1/2 inch apart on buttered large baking sheets. Make more cookies in same manner with remaining chilled dough, trimmings (reroll once), and filling.
Bake cookies in batches in middle of oven until golden around edges, 16 to 20 minutes. Transfer cookies to racks and cool until warm, about 10 minutes.
Enjoy!