Browsing Category

Uncategorized

Raspberry Swirl Cupcakes {Video}

Raspberry Swirl cupcakes 10

Okay, so I have a bit of an obsession with cupcakes… does it show? 🙂 And I have been dreaming up this cupcake the last week… tart raspberry, lemon, a bit of orange, all baked into a sweet pound cake base and topped of cream cheese frosting. Yes, I know what your thinking, “wow, that sounds rich!” but the flavors kept on going through my mind and I knew I had to give it a try!  It is quite strange for a dessert to sound good to me that doesn’t contain a large amount of chocolate but this one did! So, with a few kidlets by my side, I set out to concoct the dream cupcake yesterday! 😉 It was well worth the time and effort and the Raspberry Swirl Cupcake has now taken 1st place on my “favorite cupcakes” list! A decadent moist cake with a punch of summer flavor!

Side note: If you not a huge raspberry fan, leave it our! The younger crowd wasn’t too fond of the idea of raspberry so I didn’t put it in their cupcakes!

Yields 24-30 delightful cupcakes

Ingredients

  • 1 1/2 cups (3 sticks) salted butter{softened}
  • 1 bar (8 ounces) cream cheese{softened}
  • 3 cups sugar
  • 5 large eggs
  • 1 tbs pure vanilla extract
  • 3 cups all-purpose flour
  • 2 tsp salt
  • The zest of 1 orange
  •  The zest and juice of 3 lemons
  • Raspberry Preserves

Icing

  • 2 sticks butter{softened}
  • 1 pkg cream cheese{softened}
  • 1/2 cup milk
  • 1 tsp almond extract
  • 1tbs pure vanilla extract
  • 6-8 cups powder sugar

Directions

  1. Preheat oven to 350 degrees. With an electric mixer, beat butter and cream cheese until smooth. Add sugar; beat until light and fluffy, about 5 minutes. Add eggs, one at a time, beating well after each addition. Mix in vanilla, lemon juice, and zest. With mixer on low, add flour and salt in two additions, beating until just combined.
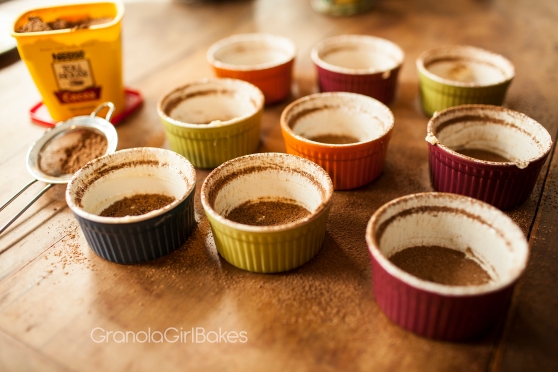
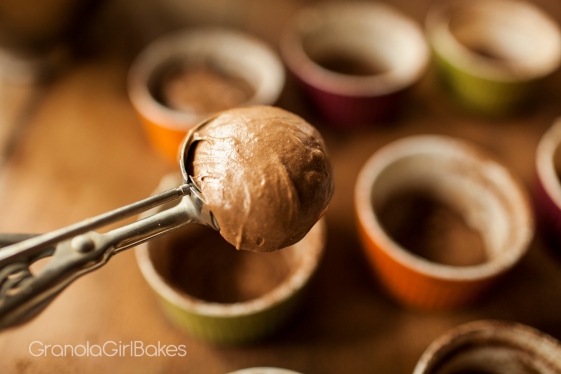
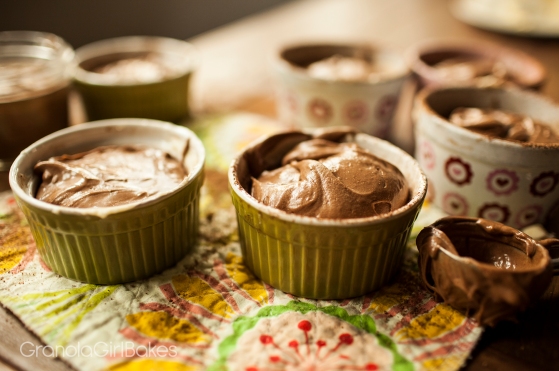
  2. Line muffin tins with cupcake liners or lightly butter and flour tins to prevent sticking! Scoop a mounding 1/4 cup batter into each cup, dollop about a tbs raspberry preserves per cupcake and swirl with a knife!
  3. Bake until golden and a toothpick inserted in the centers comes out almost clean, 15-18 minutes.
  4. Cool 10 minutes in the pan. Then cool completely on a wire rack.
  5. In the mean time prepare the icing! Beat butter, cream cheese, milk, almond extract, & vanilla until combined. Slowly but surely add in the powdersugar
  6. Once the cupcakes are completely cooled, pipe icing on thick and finish up with a small dollop of raspberry preserves.
  7. Enjoy! 🙂

[vimeo 69923418 w=620 h=348]
Raspberry Swirl cupcakes 9Raspberry Swirl cupcakes 1

Raspberry Swirl cupcakes 4
Raspberry Swirl cupcakes 8

‘Tis Peach Season!

Peaches are fresh here in the Texas Hill country! Take a drive down the old country road and you will see peach orchard after peach orchard and peach stands full of fresh fruit ripened to perfection, icecream, and even cobbler. 🙂 Needless to say, I am enjoying the peach season immensely! Keep your eyes open for a  peach recipe on my blog {very soon} but until then, whats your favorite peach dessert? 🙂

peaches 1

peaches“To every thing there is a season, and a time to every purpose under the heaven”
Ecclesiastes 3:1

Outrageously Delicious Peanut Butter Chocolate Chip Cookies {Naturally Gluten Free!}

Chocolate Chip Peanut Butter Cookies 8:: Granola Girl Bakes

Yes, it is true! These are outrageously delicious and 100% naturally gluten-free! I was almost afraid to put “gluten-free” in the title because I may scare some of you off. 🙂 Believe me, I usually can’t stand{and that’s putting it mildly} flour substitutes but I can’t even taste a difference in these cookies!! The recipe originally called for white flour and white & brown sugar but a few weeks back I got the whim to try something new. So, I substituted the white flour and used ground oats{oat flour} and instead of the white & brown sugar I used pure maple syrup! To be honest, I thought the batch was going to be a huge disaster… but they were a hit and I have made several batches since!! Aaannnd they are best for breakfast. 😉

The secret to oat flour is letting the batter/dough set for a good hour or so before baking in order to absorb and stiffen a bit! Also, this recipe is just as good without the chocolate chips! So, if you’re not in the mood for chocolate, leave them out for a delicious peanut butter cookie! 🙂

Chocolate Chip Peanut Butter Cookies :: Granola Girl Bakes
Yield: 2 dozen cookies

Ingredients

  • 1/2 cup butter {softened}
  • 1 1/2 cups all-natural peanut butter{crunchy or creamy}
  • 1 cup pure maple syrup
  • 1 egg
  • 1 tbsp vanilla extract
  • 2 cups oat flour{or 2 1/2 cups old-fashioned oats ground}
  • 1 tsp baking soda
  • 1 tsp salt
  • 12 oz chocolate chips

Directions

  1. Combine butter, peanut butter, maple, egg, and vanilla extract until creamy.
  2. Add oat flour, baking soda, salt, and chocolate chips. Stir until well combined.
  3. Let dough set covered for 1 hour or refrigerate overnight.
  4. Preheat oven to 350 degrees. Spoon dough onto tray and bake for 10-13 minutes or until golden!
  5. Enjoy!! 🙂

Chocolate Chip Peanut Butter Cookies 4:: Granola Girl Bakes

Chocolate Chip Peanut Butter Cookies 2: Granola Girl Bakes
Chocolate Chip Peanut Butter Cookies 6:: Granola Girl Bakes
  Chocolate Chip Peanut Butter Cookies 7:: Granola Girl Bakes  Chocolate Chip Peanut Butter Cookies 14: Granola Girl Bakes Chocolate Chip Peanut Butter Cookies 15:: Granola Girl Bakes
Chocolate Chip Peanut Butter Cookies 8:: Granola Girl Bakes

My Sister’s Tiramisu Cupcakes ❥

tiramisu cupcakes 5

Don’t they look delicious?? Well, they taste 1,000 times better than they look. 😉 These are my sister’s Tiramisu cupcakes!  Lydia always surprises us with something unique and delicious. Whether it is a coconut cake{which is my favorite!} or oreo stuffed chocolate chip cookies, or these cupcakes. Her confections always turn out extremely delicious! A light and fluffy cupcake base, infused with espresso, and topped off with a delightfully fluffy whipped cream/cream cheese frosting & cocoa dusting!

Yield: about 28 cupcakes or 14 mugs 🙂

Ingredients

cupcakes:

  • 1¾ cups plus 2 tbsp. flour, sifted
  • 1¼ tsp baking powder
  • ¾ tsp coarse salt
  • 6 tbsp milk
  • 6 tbsp unsalted butter, at room temperature, cut into pieces
  • 5 large whole eggs plus 4 large egg yolks
  • 1½ cup sugar

Soaking syrup:

  • ½ cup freshly brewed espresso (or coffee)
  • 1 tbsp vanilla
  • 6 tbsp sugar

frosting:

  • 1½ cups heavy cream
  • 12 oz cream cheese, at room temperature
  • ¾ cup confectioners’ sugar, sifted
  • Unsweetened cocoa powder, for dusting

Directions

  1. To make the cupcakes, preheat the oven to 325˚ F.  Line cupcake pans with paper liners or lightly butter and flour 14 mugs/mason jars.
  2. Combine the  flour, baking powder, and salt in a medium bowl.  Whisk to blend; set aside.  Add the milk to a small saucepan.  Heat over medium-high heat just until bubbles appear around the edge of the pan.  Whisk in the butter until melted.  Let stand 15 minutes.
  3. In the bowl of an electric mixer, combine the eggs, egg yolks, and sugar.  Whisk lightly to blend.  Set the bowl over an inch or two of simmering water and heat, whisking occasionally, until the mixture is warm and the sugar is dissolved, about 6 minutes.  Return the bowl to the mixer base.  Whisk on high speed until the mixture is pale yellow and fluffy, and able to hold a ribbon when the whisk is lifted.
  4. Gently fold the dry ingredients into the egg mixture in three additions.  Stir ¾ cup of the batter into the milk mixture to thicken, then fold the milk mixture into the batter just until evenly incorporated.  Divide the batter between the prepared liners, filling them about three-quarters full.  Bake, rotating the pans halfway through baking, until the cakes are set and light golden, about 20 minutes.  Transfer pans to wire racks to cool slightly before removing from the pans.
  5. To make the soaking syrup, combine the hot coffee, vanilla, and sugar, and stir until the sugar is dissolved.  Place the warm cupcakes on a wire rack and place a baking sheet underneath to catch dripping liquid.  Use a pastry brush to brush the soaking liquid onto the tops of the cupcakes, repeating until the syrup is used up.  (This took me about four or five cycles of brushing).  If necessary, poke each cupcake a few times with a wooden skewer to help the syrup soak in.  Let the cupcakes cool completely before frosting.
  6. To make the frosting, add the heavy cream to the bowl of a stand mixer fitted with the whisk attachment.  Whip on medium-high speed until stiff peaks form.  Transfer to a separate bowl and return the mixer bowl to its base.  In the mixer bowl, combine the cream cheese and confectioners’ sugar and beat with the paddle attachment on medium-high speed until smooth and fluffy, about 2 minutes.  Fold about a third of the whipped cream into the cream cheese mixture with a spatula to lighten.  Gently fold in the remaining whipped cream until evenly combined.
  7.  Pipe a large dollop of frosting on top of each cupcake and dust with cocoa powder!
  8. ENJOY! 🙂

tiramisu cupcakes 1

tiramisu cupcakes 3
tiramisu cupcakes 4
tiramisu cupcakes 6

No-Bake Peanut Butter Cup Cheesecake | Naturally Gluten Free!

Peanutbutter cup cheesecake 17

Yes, its true! Naturally gluten-free!! 🙂 And on top of being gluten-free, it is also naturally sweetened with pure maple syrup. PLUS it’s delicious! This is a win/win dessert! 😉 Okay, so my sisters and I decided to get back to a healthy-ish way of eating lately but we have really missed the delightful combination of chocolate and peanut butter. Then I remembered this delicious no-bake cheesecake on one of my favorite cooking blogs and thought, “why not use the base to make a peanut butter cup cheese-cake!!!” A nutty crust, smooth cream-cheesy peanut-buttery filling, and a thick layer of chocolate ganache to top it off. Healthy? Well, it’s healthy-ish. 😉  So, without further ado, No-bake Peanut Butter Cheesecake!
Peanutbutter cup cheesecake.1

Yields: 1 9 inch round/12 servings

Crust Ingredients

  • 1 cup unsweetened shredded coconut
  • 1 cup sliced almonds
  • 3 TBS melted butter
  • 3 TBS Pure Maple syrup
  • dash salt

Directions

  1. In a food processor, blend coconut and almonds until fine. Add butter, maple, and salt. Pulse until blended!
  2. Press into a 9 inch spring-form cheesecake pan and set aside.


Peanutbutter cup cheesecake 12 Peanutbutter cup cheesecake 11 Peanutbutter cup cheesecake 10

Cheesecake Ingredients

  • 2 8oz pkg softened cream cheese
  • 1 cups all-natural unsweetened peanut butter
  • 1/2 cup pure maple syrup
  • 1/2 cup heavy cream
  • 1 tbs vanilla extract
  • 1/4 tsp salt

Ganache

  • 10 oz dark chocolate chips
  • 1 tbs vanilla extract
  • 3/4 cup heavy cream
  • 2 tbs butter

Directions

  1. Cream cream cheese, peanut butter, pure maple, 1/2 heavy cream, 1tbs vanilla, and salt in blender on med-high speed until fluffy(about 2 minutes.)
  2. Spread evenly over crust. Allow to cool in refrigerator for at least 1 hour(I let it set overnight)!

Ganache instructions

  1. Place chocolate chips and vanilla in heat-proof bowl.
  2. Bring heavy cream and butter to simmer over stove top then pour over chocolate chips. Let set for 3 minutes
  3. While it sets, loose cheesecake from spring-form.
  4. Once set for 3 minutes, whisk ganache until smooth and chocolate is combine!
  5. Spread evenly over cheesecake and refrigerate for at least 1 hours.
  6. Enjoy! 🙂

Peanutbutter cup cheesecake 8  Peanutbutter cup cheesecake 6  Peanutbutter cup cheesecake 5

Peanutbutter cup cheesecake 20Peanutbutter cup cheesecake Peanutbutter cup cheesecake-13  Peanutbutter cup cheesecake 16 Peanutbutter cup cheesecake 18

Hot Cocoa for 1

Hot Cocoa for 1! Granola Girl Bakes

Okay, so there is a bit of a hot chocolate obsession going on amongst my sisters and I. What can I say, we REALLY like chocolate! (: Not quite sure what we will do once “hot chocolate season” comes to an end?!? 😉 So, for today, Hot Cocoa for 1. Extremely delicious, perfect combination of dark chocolate & sweetness, and super quick! Add espresso to the cup and you have a pretty delicious mocha. 😉

1 Cup Hot Cocoa!

Ingredients

  • 1.5 ouces Chopped unsweetened Chocolate
  • 1 1/2 tbs Raw sugar
  • 1 cup Whole milk
  • 1/2 tsp Pure vanilla extract
  • 1 Pinch salt

Directions:

  1. Heat milk over med-high heat in small sauce pan, whisking constantly. When almost at a simmer, turn down the heat to low add the chocolate, sugar, and Salt. Whisk until melted and well combined. Add the vanilla and pour into a very happy mug.
  2. Top with a VERY LARGE dollop of freshly whipped cream or a marshmallow and ENJOY! (:

Caramel Cream Latte

caramel latte 5

It is the day before my sister’s birthday!! Yes, that is exciting. 🙂 So I decided she was entitled to a pre-birthday coffee. A very simple recipe but I have also included my home-made caramel sauce bellow which is very simple too and you will LOVE it. Home-made caramel sauce, vanilla, espresso, freshly whipped cream, and dark chocolate! What’s not to love? 😉

1 latte !

Ingredients

  • 2 Shots espresso or 1/2 cup VERY strong coffee 🙂
  • 2 tbsp Caramel Sauce(recipe bellow or you can use store-bought caramel sauce)
  • 1/2 tsp Pure vanilla
  • 1/2 cup Whole milk frothed or heated
  • Whipped cream
  • Chocolate shavings

Directions:

  1. Stir espresso, caramel, and vanilla in a cute mug.
  2. Add milk and top with whipped cream, caramel drizzle, and chocolate shavings!
  3. Thoroughly enjoy! 🙂

Home-made Caramel Sauce

Yields 1.5 cups… approximately. 🙂

  • 1 cup raw sugar
  • 6 tbsp butter cubed
  • 1/2 cup heavy cream

Directions:

  1.  First, before you begin, make sure you have everything ready to go – the cream and the butter next to the pan, ready to put in. THIS WILL BE HOT! I recommend wearing a glove or mitten when making this as it gets really hot!
  2. Heat sugar on moderately high heat in a heavy-bottomed saucepan. As the sugar begins to melt, stir vigorously with a whisk. As soon as the sugar comes to a boil, stop stirring. Swirl the pan a bit but do not stir from this point on.
  3. As soon as all of the sugar crystals have melted (the liquid sugar should be dark amber in color), immediately add the butter to the pan. Whisk until the butter has melted.
  4. Once the butter has melted, take the pan off the heat. Count to three, then slowly add the cream to the pan and continue to whisk to incorporate.
  5. Whisk until caramel sauce is smooth. Let cool in the pan for a couple minutes, then pour into a glass mason jar and let sit to cool to room temperature.

Caramel Latte caramel latte.81.23.12.7  1.23.12.9 caramel latte 3

Molten Lava Cakes

Molten Lava Cakes By GranolaGirlBakes.com

Okay, so our “no-gluten, no-dairy, no-sugar” diet hasn’t been going to great lately. Obviously! 🙂 Molten Lava Cakes…. they are healthy…. really they are! Chocolate is full of antioxidants and I hear it is a belly flattener. 😀

Okay, so these are dangerously delicious and really quick to prepare. A chocolate cake that has a slightly gooey center. Serve hot with ice-cream and you have the world’s best and quickest desert! I usually have to make 14 little cakes to satisfy my family but I have revised the recipe to make 6 generous Lava Cakes. (:

Original Recipe Yield 6 cakes

Ingredients

  • unsweetened baking cocoa
  • 6 oz semi-sweet (or dark) chocolate chips
  • 1/2cup plus 2tbs butter
  • 3 whole eggs
  • 3 egg yokes
  • 1 1/2 cup powder sugar
  • 1/2 cup flour
  • 1tsp vanilla
  • dash salt

Directions

  1. Heat oven to 450° F. Grease bottoms and sides of 6 (6oz) custard cups or mason jars with butter. Dust with cocoa powder. In a sauce pan, melt butter and chocolate chips. Allow to cool slightly.
  2. In large bowl, beat whole eggs and egg yolks with wire whisk or eggbeater until well blended. Beat in 1 1/2 cup powder sugar. Beat in melted chocolate mixture, flour, salt, and vanilla. Divide batter evenly between cups. I find an icecream scoop works wonderfully for this!
  3. Bake for 12-14 minutes or until sides are set and centers are still soft(top will puff and crack.) Let stand for 3 minutes but NO LONGER! 🙂 They are best warm.
  4. Serve with icecream and ENJOY!

1.12.8 1.12.7 1.12.6 1.12.5 1.12.4 1.12.3 1.12.2 1.12.1 1.12.12 1.12.11

Salted Caramel Mocha Cupcakes

This is the week of my sister’s birthday and I am excited!! 🙂 So, we decided to give her a full week of celebration! Today I made Micah Salted Caramel Mocha Cupcakes!!

Chocolate pound cake, beneath a layer of coffee, caramel, ganache, and salted caramel frosting. Top it off with a caramel drizzle and you have a cupcake that is likely to knock you out! Yes, I know. VERY RICH! Don’t try to eat the whole cupcake in one setting without an entire pot of coffee. 😉 And don’t let the layers intimidate you. The preparation really isn’t time-consuming at all!

I used 8oz disposable coffee cups(un-waxed, paper cups. Not plastic!) but you can use coffee mugs or muffin cups! 🙂

Original Recipe makes 13 rather large cupcakes!

Cake

  • 1 1/2 cups butter, softened
  • 3 cups white sugar
  • 5 eggs
  • 2 teaspoons vanilla extract
  • 2 teaspoons instant coffee granules dissolved in 1/4 cup hot water
  • 1 cup buttermilk
  • 2 cups all-purpose flour
  • 3/4 cup unsweetened cocoa powder
  • 1/2 teaspoon baking powder
  • 1 teaspoon salt

Directions

  1. Preheat oven to 350 degrees F. Grease and flour a 13 8oz coffee cups. Mix together the flour, cocoa, baking powder, and salt. Set aside.
  2. In a large bowl, cream together the butter and sugar until light and fluffy. Beat in the eggs one at a time, then stir in the vanilla. Beat in the flour mixture alternately with the dissolved coffee and buttermilk. Pour batter into prepared pan.
  3. Bake in the preheated oven for 20-25 minutes, or until a toothpick inserted into the center of the cake comes out clean. Let cool in pan for 10 minutes.

After cakes have cooled, add latte layer. Latte Layer:

  • 1 pkg cream cheese (softened)
  • 2 tbsp milk
  • 1 tbsp instant coffee
  • 2 cups powder sugar
  1. Beat all ingredients on high until light and fluffy!
  2. Spread evenly over each cupcake.

Next spread 3/4 cup caramel evenly over all 13 cupcakes.

Then Ganache:

  • 8oz Semi-sweet Chocolate Chips
  • 2 tbsp butter
  • 3/4 cup heavy cream
  • 1 tsp vanilla
  1. Place chocolate chips and vanilla in a heat proof bowl
  2. Bring butter and heavy cream to a boil. Then pour over chocolate chips and allow to set for about 4 minutes.
  3. Whist until smooth and pour evenly over cupcakes!

Now it’s time for the icing!

  • 1/2 cup caramel
  • 1 tsp salt
  • 2 sticks butter (softened)
  • 1 pkg softened cream cheese
  • 4-5 cups powder sugar
  1. Cream together the butter and cream cheese.
  2. Pour in the salt & caramel. Beat until combined.
  3. Slowly add the powdered sugar, and beat for a few minutes until really light and fluffy. Pipe over Ganache!

Last thing to do is drizzle with caramel, find 13 hungry friends, and enjoy!! 🙂


Baklava!

Baklava,  Turkish in origin and absolutely delicious! I usually make this in the winter but when cleaning out my freezer I found 2 essential ingredients for a batch. Since when did I buy a pound of phyllo (it must have been last winter…)? And since when do we have a spare pound of walnuts that are just waiting to be used?? Plus, I noticed I got a little over-zealous when buying honey last shopping trip. I had quite a stash of the golden goodness just yelling, “USE ME”! 😉  Seeing that everything was falling into alignment, I decided it was “meant to be” for me to make Baklava! 🙂
I made my first batch of baklava 8ish years ago after a local store that sold it closed. I still use the original recipe found here but the only thing is I am not afraid of butter and live by the motto, “everything better with butter!” 😉 So, I do use an addition stick of butter in my baklava. But I will post the original recipe. Just remember, you might need additional butter!
The hardest part of this recipe is waiting 24 hours for the Baklava to set without having some-one sneak a piece. But once it is finished, fix yourself a cup of Turkish Coffee, grab a piece of Baklava, and perhaps a scoop of ice cream on the side :), then enjoy!

Ingredients

  • 1 lb Walnuts – Finely Chopped
  • 1/2 C. Sugar
  • 2 tsp Cinnamon
  • 1.5 C. Butter (3 sticks), Melted
  • 1 Package Frozen Phyllo Dough (16 oz) Thawed
  • 1 C. Sugar
  • 1 C. Water
  • 1 Tbsp Lemon Juice
  • 1 C. Honey (Net weight 12 oz.)
  • 1/2 tsp Vanilla

Directions

  1. Preheat the oven to 300 degrees.
  2. Combine and set aside walnuts, 1/2 cup sugar, and cinnamon
  3. Using a pastry brush, lightly brush the bottom and sides of a 10×14″ (about 1-2″ deep) pan with melted butter.
  4. Open the phyllo dough and layer 6 whole leafs (or 12 half leafs) in the pan, buttering each layer as you go. (The edges will extend over the side.)
  5. Spread 1 cup of the walnut mixture.
  6. If your phyllo dough comes in full sheets, cut the remaining phyllo dough in half.
  7. Layer 8 half sheets — butter each layer. Each sheet will be an inch or so short, so stagger the sheets from corner to corner to cover the whole pan. I use a pattern so I don’t forget how many layers I’ve put down, but it’s even easier if you have a friend help!
  8. Spread 1 cup of the walnut mixture.
  9. Repeat 8 sheets and walnut mixture twice. You will end up with 4 layers of nuts.
  10. Layer the remaining half sheets on top — butter each layer.
  11. Brush the top with the remaining butter.
  12. Trim the edges off.
  13. Cut halfway through the layers using the (new and improved right-hand or left-handers) diagram to the right. See my baklava FAQ page for more tips on cutting. (Note: Do NOT cut from corner to corner.) This is done now since it will be very fragile after it’s been baked.
  14. Bake 1 hour or until golden brown.
  15. 15 minutes before the baklava should be done, mix 1 cup sugar, water, and lemon juice in a sauce pan.
  16. Cook sauce over a medium heat, stirring occasionally for 15 minutes.
  17. Remove from heat, add the honey and vanilla, and stir until well blended.
  18. Remove the baklava from the oven and finish cutting through the layers.
  19. Pour the sauce over the hot baklava.
  20. Cool. Let it sit for at least 24 hours (lightly covered — but not in the refrigerator) — longer if you can stand it!
  21. ENJOY!!